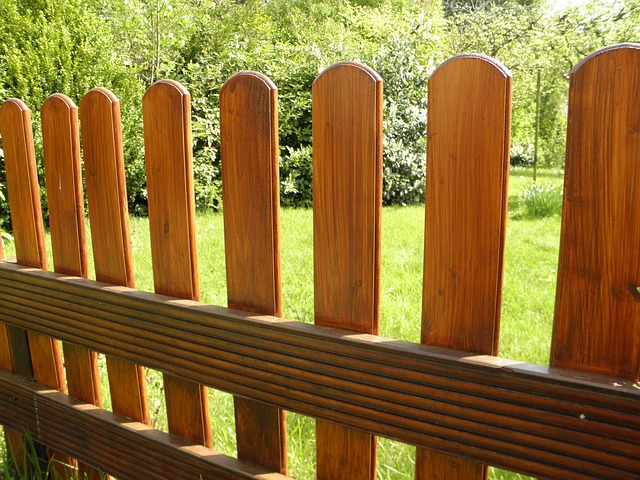
Fence Staining and Sealing: A Comprehensive Guide to Revitalizing Your Wooden Fences
Maintaining your outdoor space starts with enhancing your wooden fence. This article provides an all-encompassing guide to the art of fence staining and sealing, offering both aesthetic improvement and protection. From understanding the benefits and exploring various stain types to preparing your fence and choosing the perfect color, we’ll walk you through each step. Additionally, learn effective sealing techniques, follow a simple staining process, and discover maintenance tips to ensure your wooden fences remain vibrant and durable for years to come.
- Understanding Fence Staining: Benefits and Types
- Preparing Your Wooden Fence for Staining
- Choosing the Right Stain: Color Options & Application
- Sealing Techniques to Protect Your Fence Long-Term
- Step-by-Step Guide: Staining and Sealing Process
- Maintenance Tips for Lasting Results
Understanding Fence Staining: Benefits and Types
Fence staining is a popular method to enhance the appearance and protect wooden fences. It involves applying a pigmented solution, usually in liquid form, to the fence’s surface. This process offers several advantages, including improved aesthetics, increased durability, and protection against elements like UV rays, rain, and snow, which can fade or damage untreated wood over time.
There are various types of fence staining products available, each with unique characteristics. Water-based stains are popular for their ease of application, low odor, and quick drying time. They also tend to be less toxic than oil-based alternatives. Oil-based stains, on the other hand, provide a deeper color and longer durability but can emit stronger fumes and take longer to dry. Some advanced formulas combine water and oil components for a blend of benefits.
Preparing Your Wooden Fence for Staining
Preparing your wooden fence for staining is a crucial step to ensure the best possible results and the longevity of your fence. Start by cleaning the fence thoroughly to remove any dirt, debris, or mildew. Use a pressure washer or a brush and a mild detergent to achieve a clean surface. This initial step is vital as it opens up the wood’s pores, allowing the stain to penetrate deeply and create a more even color.
Once cleaned, inspect your fence for any repairs needed. Fill in any cracks or holes with a suitable wood filler, and sand the area once dry to ensure a smooth finish. Remove any loose or peeling paint, as this can affect the bonding of the stain. Lightly sanding the entire fence surface helps create a more uniform base, ensuring an even application of the staining product.
Choosing the Right Stain: Color Options & Application
Choosing the right stain for your wooden fence involves considering both color and application method. First, select a color that complements your home’s exterior and the overall aesthetic you desire for your yard. Stains come in various shades, from natural wood tones to vibrant colors, offering numerous options to suit different tastes. Remember that darker stains can make wood appear closer to its original color, while lighter ones enhance the natural grain.
When it comes to application, there are typically three main methods: brush, roller, or spray. Brush applications work best for smaller, detailed areas and provide a more even finish. Rollers are ideal for larger surfaces as they cover more ground quickly. Spraying offers an efficient, all-in-one approach but may require more skill to achieve a uniform coat without drips or overspray. Each method has its advantages, so choose based on your fence’s size, the desired finish, and your personal preference.
Sealing Techniques to Protect Your Fence Long-Term
When it comes to protecting your wooden fence, sealing is an essential step beyond staining. The primary goal is to create a barrier between the wood and environmental elements that can cause deterioration over time. One common technique involves applying a clear coat sealer, which forms a protective layer on top of the stain. This not only enhances the fence’s aesthetic appeal but also shields it from water, UV rays, and extreme temperatures.
Another effective method is using a vapor barrier sealer, especially in areas with high humidity levels. This type of sealer fills in tiny pores and cracks in the wood, preventing moisture absorption that can lead to rot and mold growth. Regular sealing every 1-2 years, depending on exposure, will ensure your fence remains in top condition for years to come.
Step-by-Step Guide: Staining and Sealing Process
Step-by-Step Guide: Staining and Sealing Process
1. Preparation: Begin by cleaning your wooden fence to remove any dirt, dust, or debris. Use a pressure washer or a stiff brush with detergent to ensure a clean surface. Let it dry completely. Fill containers with the stain you’ve chosen, following the manufacturer’s instructions for dilution if needed. Grab your painting tools: brushes, rollers, trays, and drop cloths. Protect your clothes and skin with appropriate gear.
2. Staining: Apply the stained using a brush or roller, depending on the fence’s size and shape. Start at one corner and work in small sections, applying an even coat of stain. Allow the first coat to dry as per the product instructions. If desired, apply a second coat for deeper color. Always work with the grain of the wood for best results. Once stained, move on to sealing.
Maintenance Tips for Lasting Results
Regular maintenance is key to achieving and maintaining long-lasting, vibrant fence stains and seals. After initial application, it’s crucial to allow the product to cure completely before subjecting it to frequent use or exposure. Avoid washing your fence with soap or detergent as it can strip away the protective coating. Instead, opt for a gentle pressure washer or soft brush to remove any dirt or debris.
Inspect your fence regularly for signs of wear and touch up as needed. In harsh climates, reapply the stain and sealant every 1-3 years depending on exposure to sunlight, moisture, and weather conditions. Keeping an eye on these factors will help you maintain a beautiful, protected wooden fence that stands the test of time.